
Installation tips of wood deck tiles
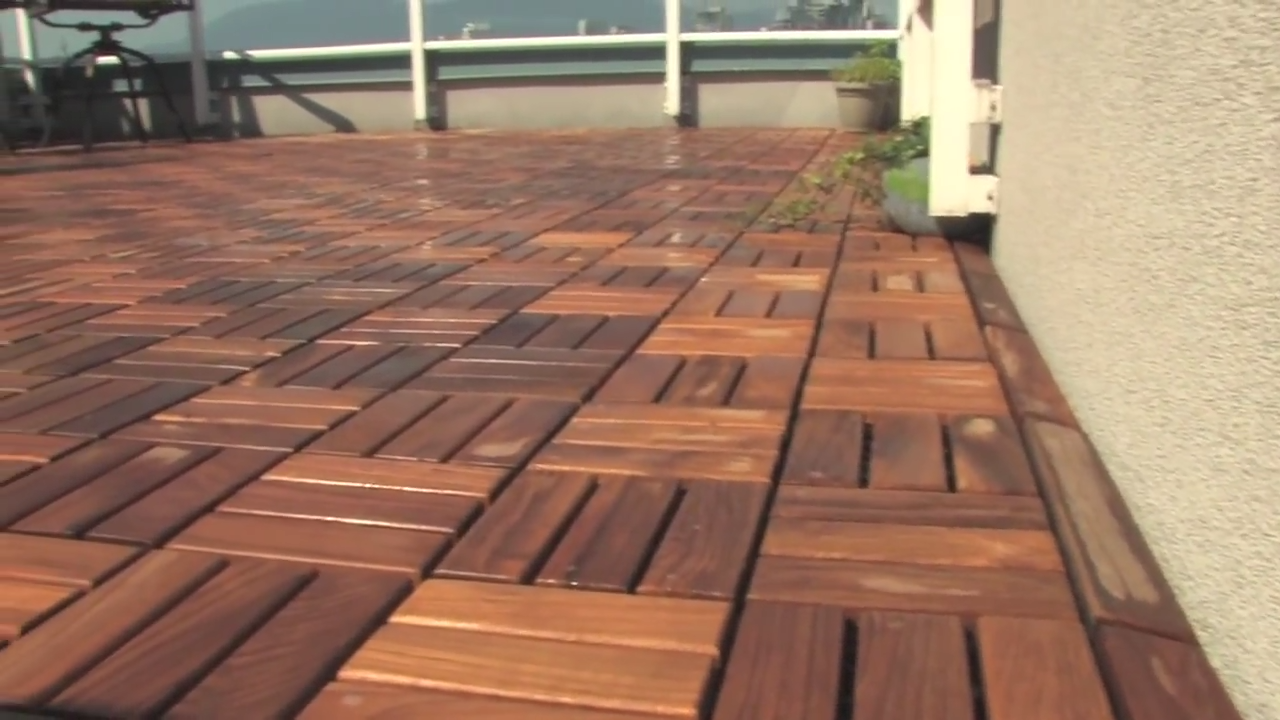
Updating the surfaces of your outdoor space is quick and easy with Wood deck tiles. This type of decking is designed with interlocking wood bars, which keep the tiles in place with little effort on your part. Not only that, but once installed, wood deck tiles are durable, beautiful and easy to maintain. As you start planning your new decking space, learn how to install the tiles properly and where you can use them. Here’s a guide on how to lay wood deck tiles.
Step 1: Ordering tiles
Before you order your tiles, get an estimate of how many you’ll need. Measure your surface, writing down the number of square feet the area has in total.
Because most deck tiles are 1 square foot, you’ll know quickly about how many you need. Of course, ordering a few extra is always a good idea, as you may need to cut tiles to fit around oddly shaped areas. Additionally, having a surplus on hand allows you to replace tiles if they become damaged. In fact, a good rule of thumb is to order 10 percent more tiles than your measurements say you need.
Additionally, consider whether you want a border for your deck. If so, include it in your coverage calculations.
Step 2: Check calculations
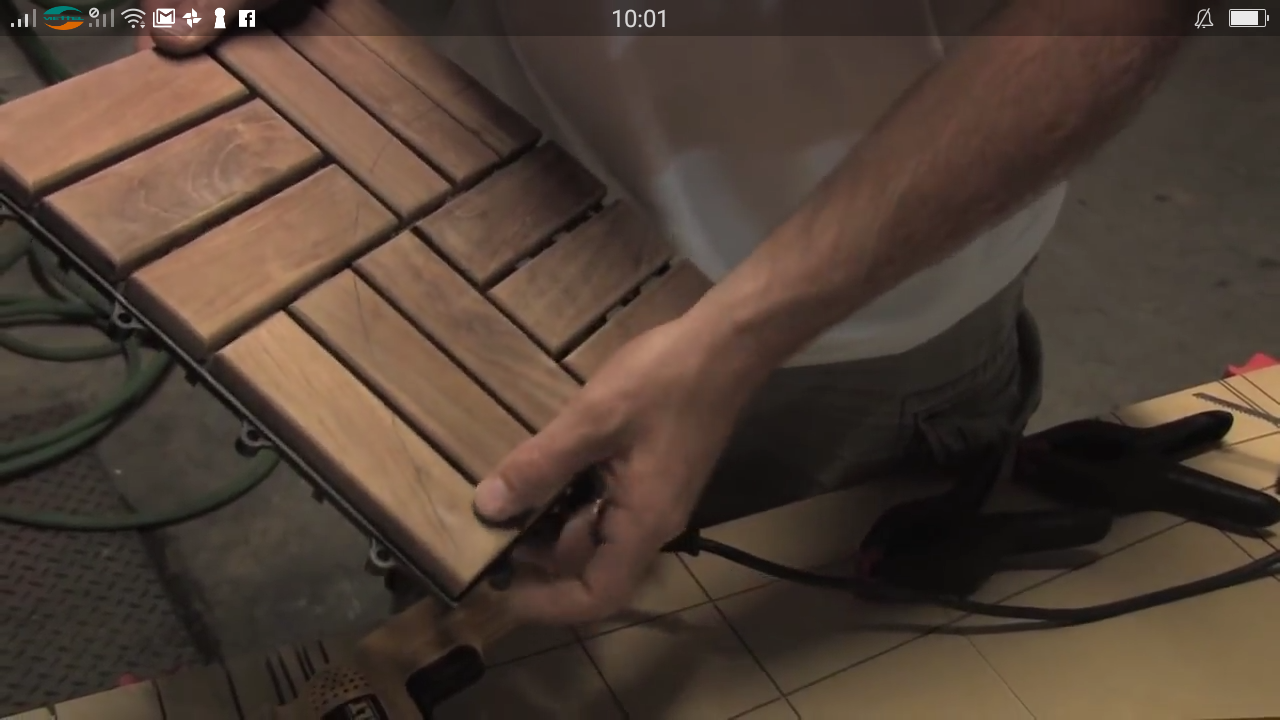
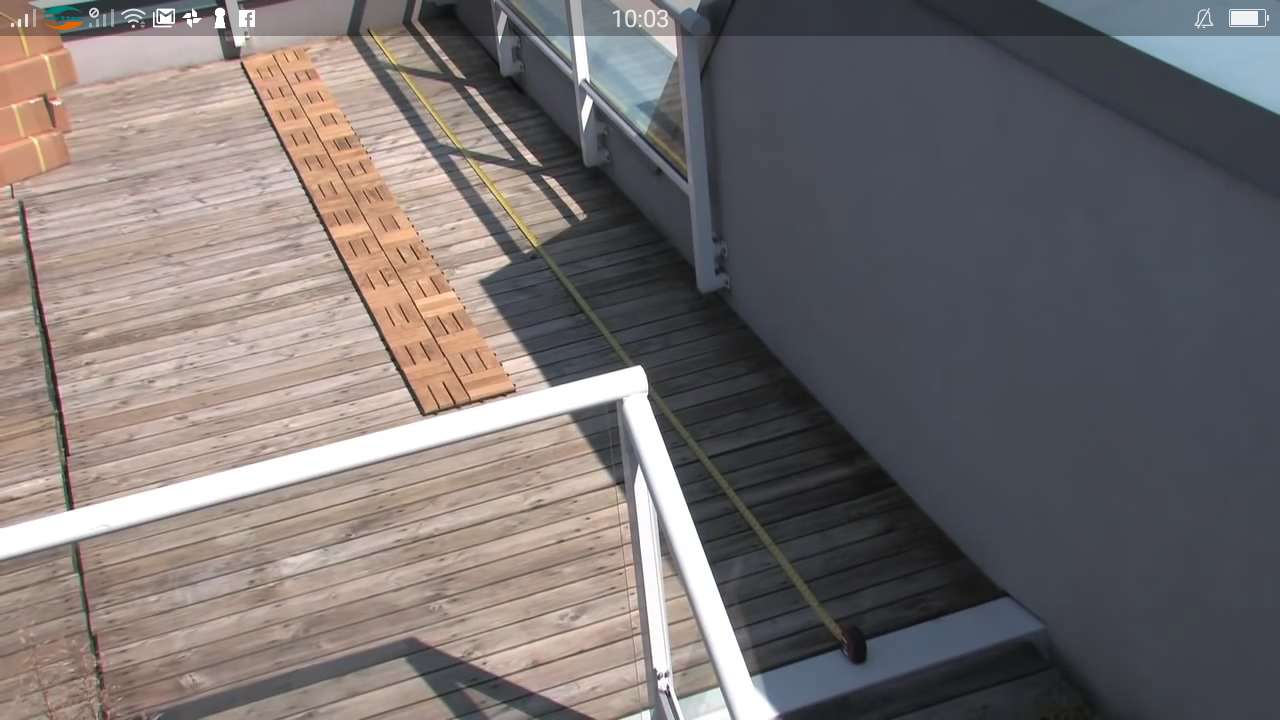
Once your deck tile has arrived, lay down a row to ensure your measurements are correct. Place one tile on the space you’re covering, then interlock the next until you’ve spanned the width of your surface. If you notice you have a gap around the edges, be prepared to cut some of your tiles if you want complete coverage.
Step 3: Install deck tiles

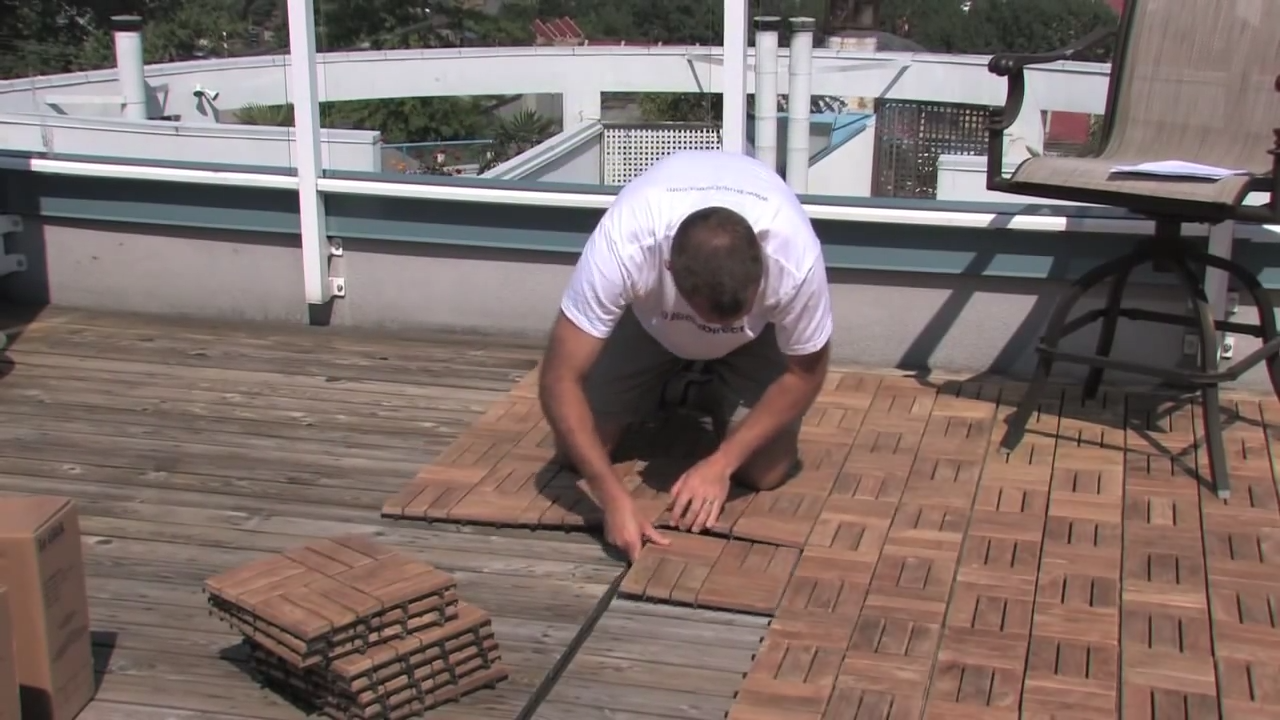
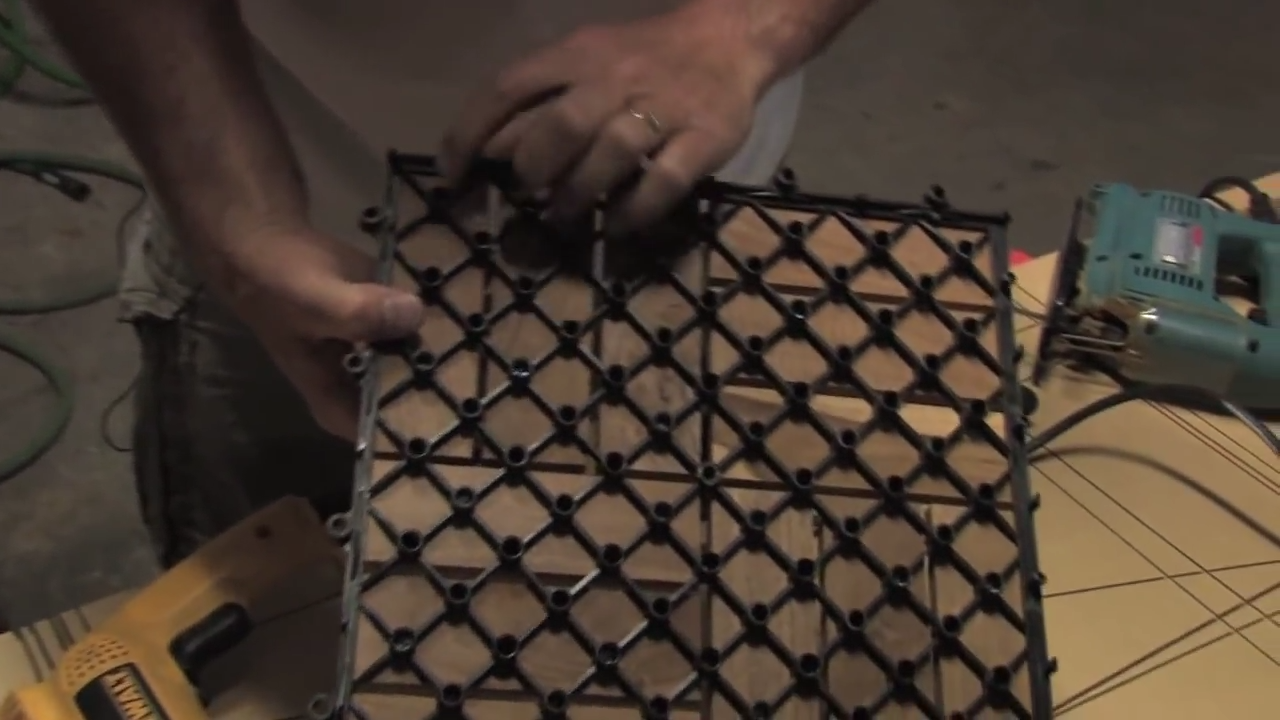
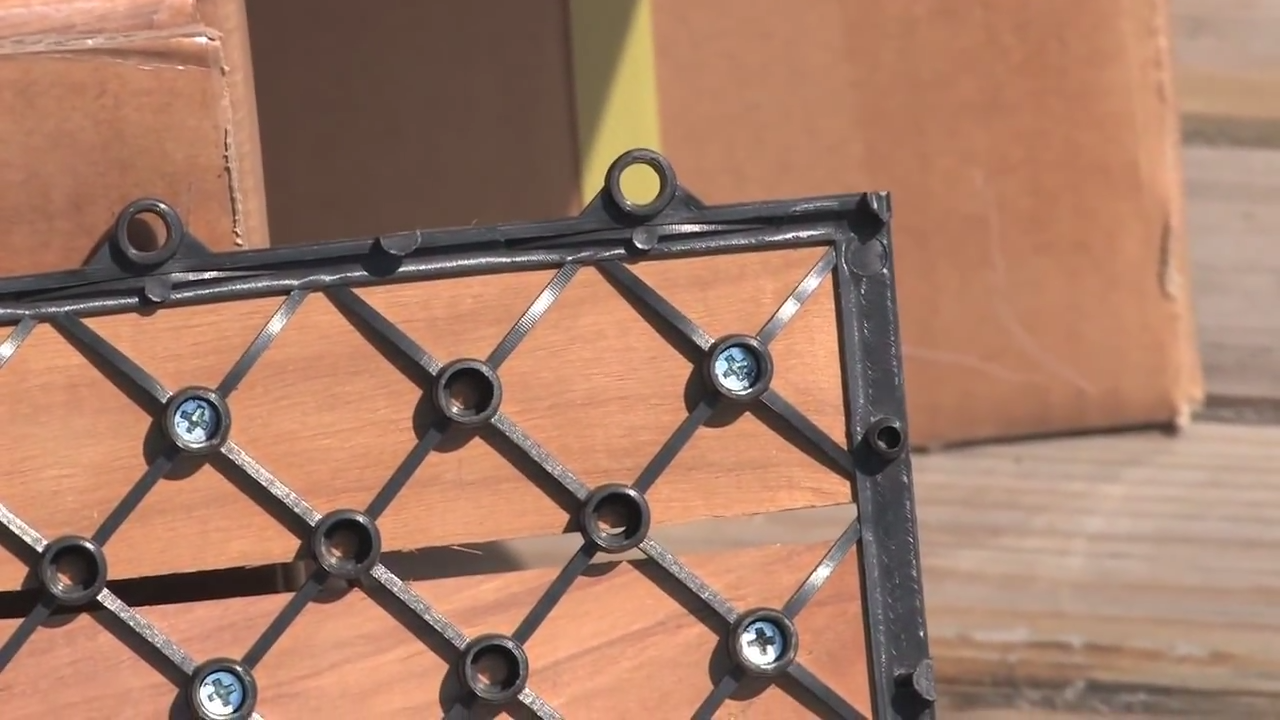
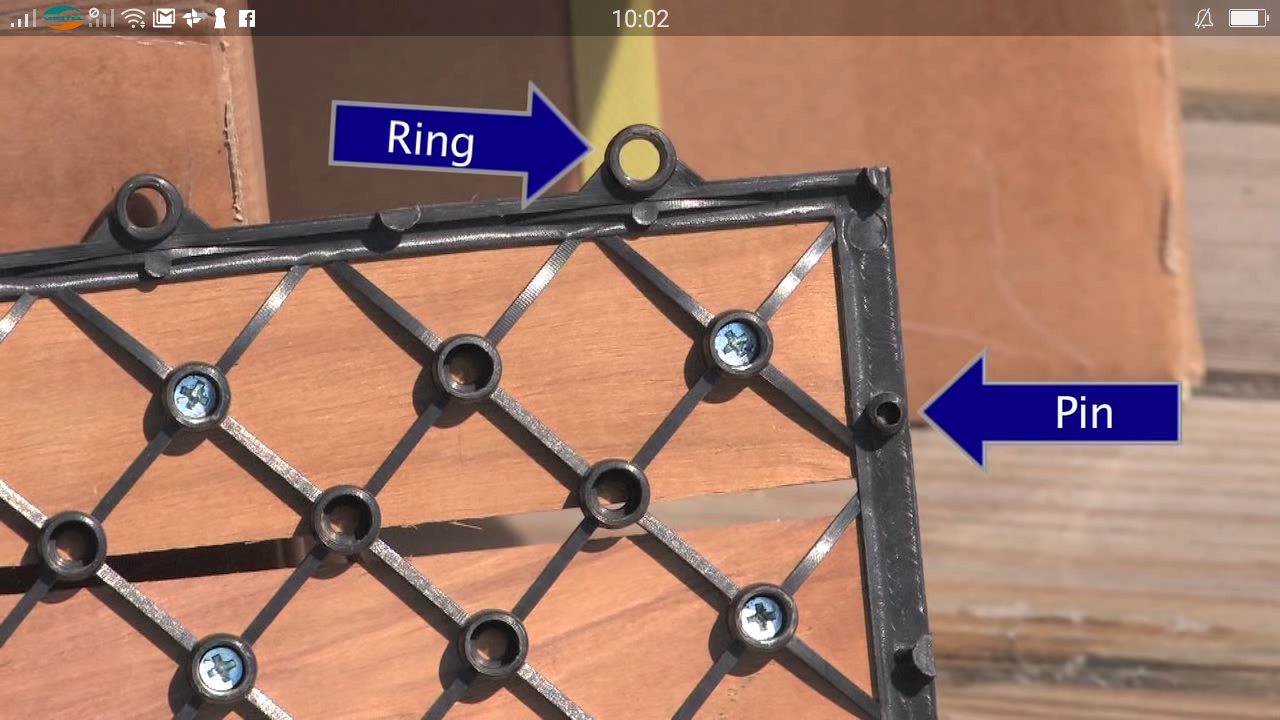
With all your measurements confirmed, you can start installing your deck. Pick a corner in which to lay your first tile. You may have to shift the tiles around to find which edges insert into others – each tile has rings and pins that you put together to interlock the tiles. You’ll find these pieces on the edges of each tile, coming out of the plastic base.
Because you need only lay the tiles together and ensure they lock, installation takes mere minutes. You can move furniture from the unfinished area to the newly laid spot without worrying amount messing up your work.
Step 4: Custom cut
If you run into an area that has an odd shape, it’s time to cut tiles to fit around it. Fill in your tiles as close as possible, then cut cardboard into 1-square-foot pieces to act as template for your tiles. Draw on your cardboard where you’ll have to cut the tiles to fit into the space. You can even cut the cardboard square and lay it in place to make sure the template is the right shape. Next, mark your actual tiles.
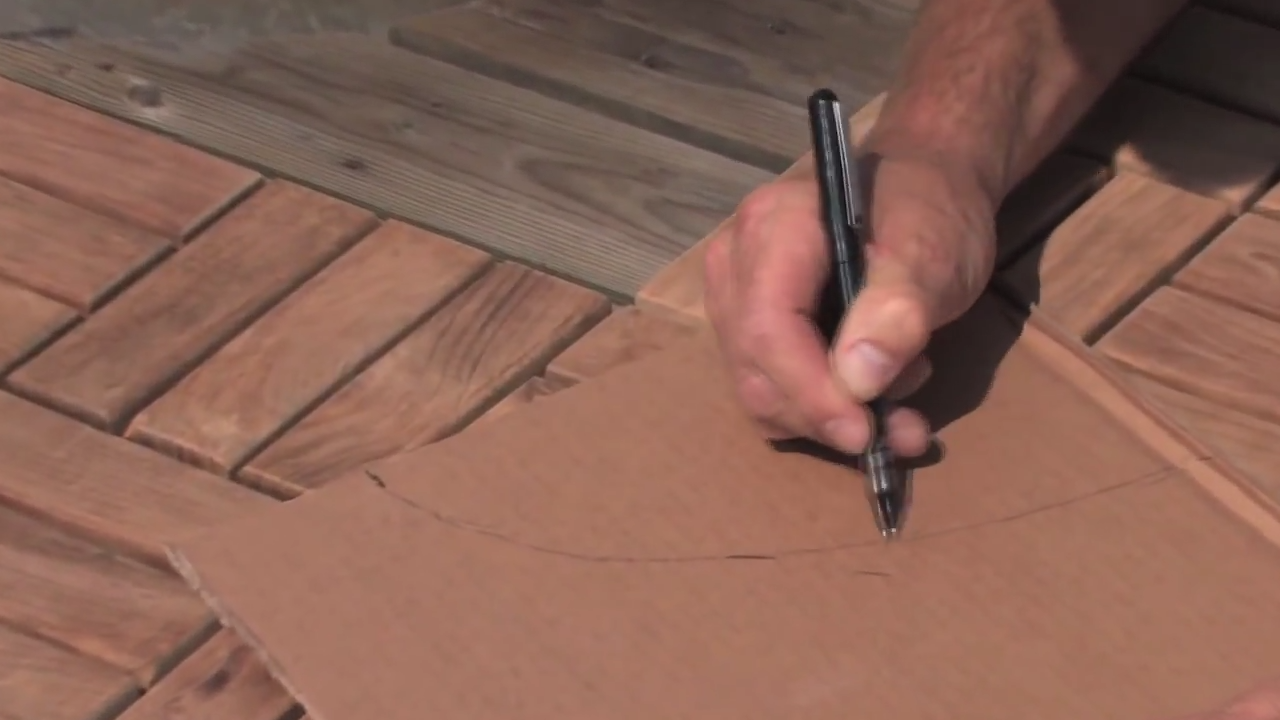
Before you cut according to the lines you copied onto your tiles, you need to make sure there aren’t any screws on your cut line. If there are, you may need to move some screws to a different fastening point. See how many screws attach each slat to the base, and ensure the same amount is in place after you cut.
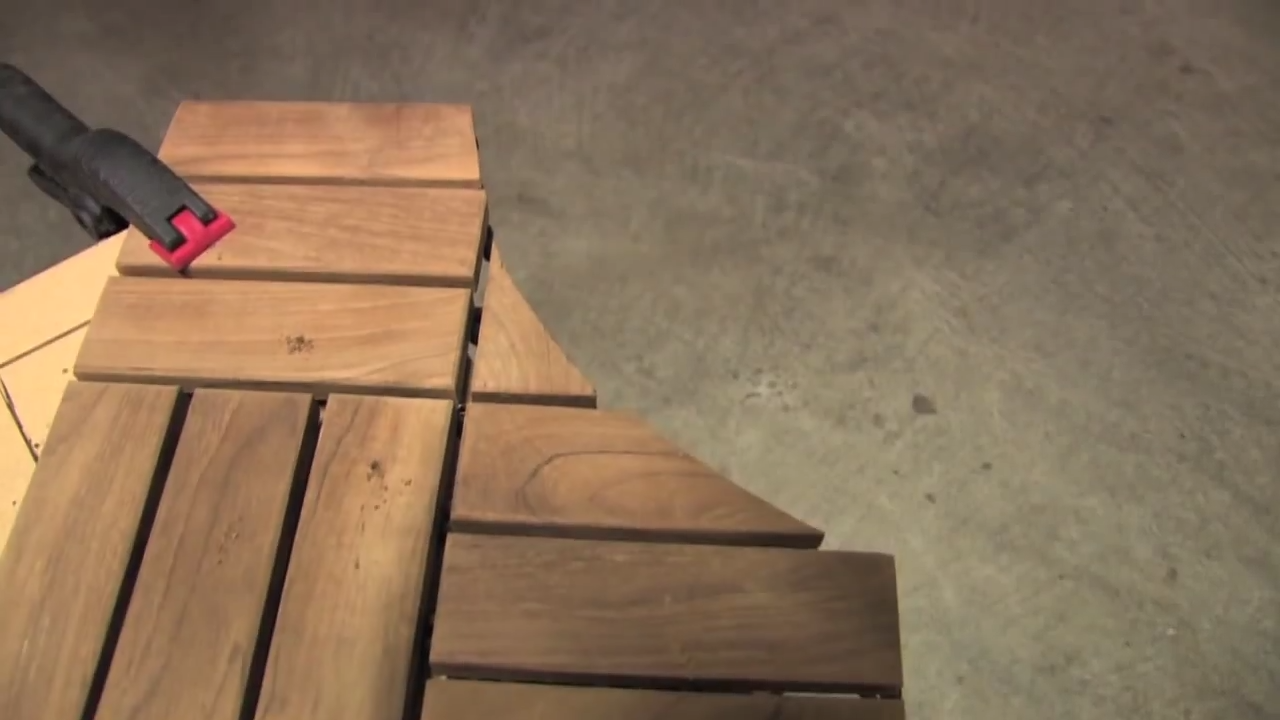
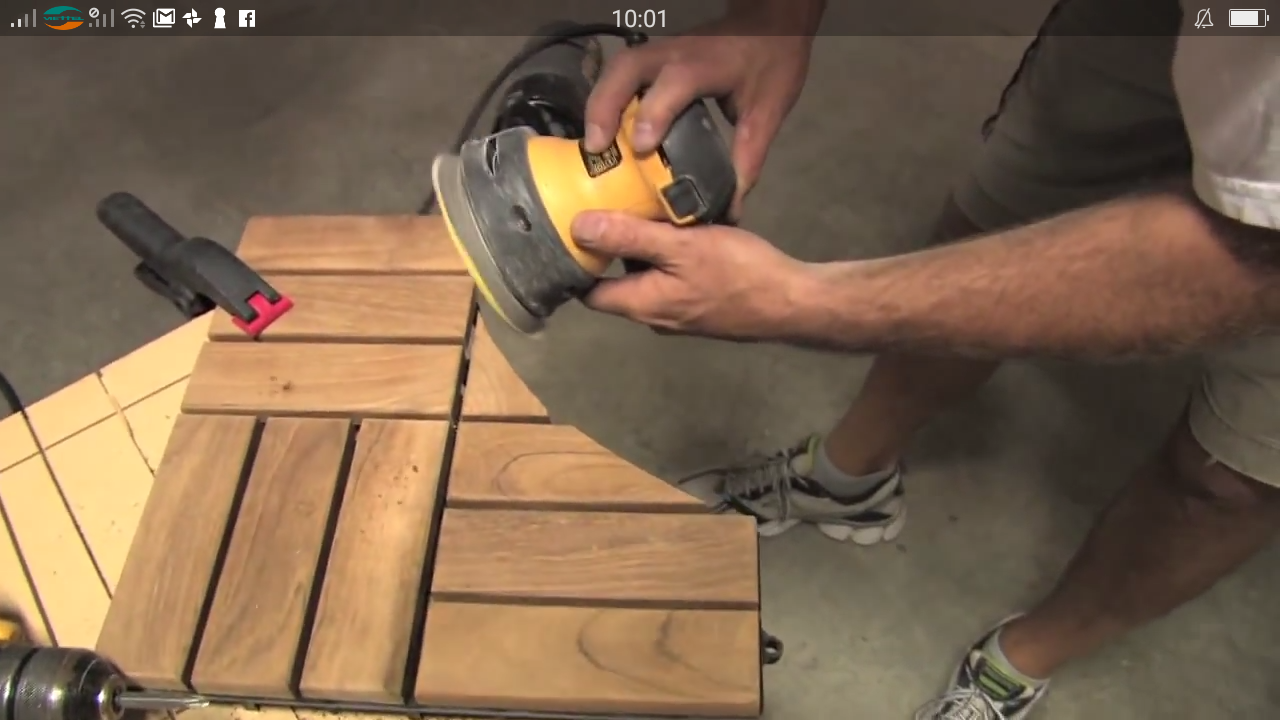
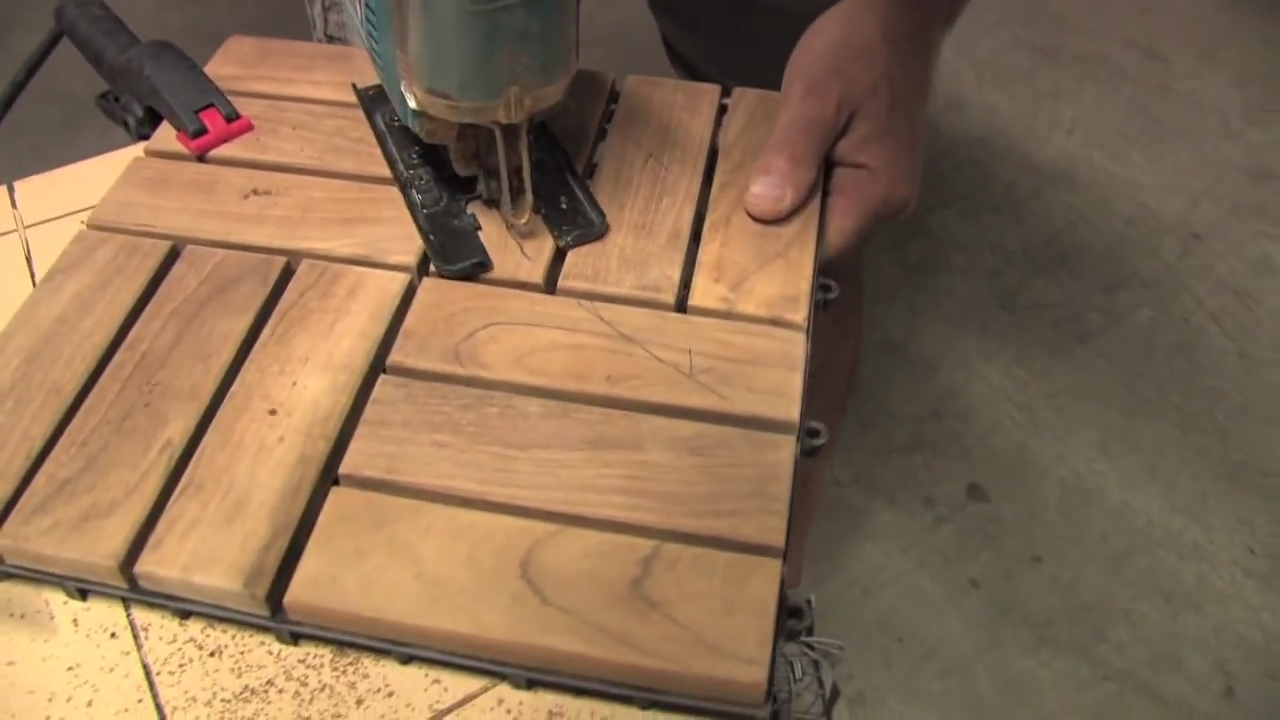
Use a jigsaw and all the necessary safety equipment to cut along your marks. Make sure you leave the tile’s correct edges intact so you can interlock your cut pieces to the ones already in place. Use a palm sander or a Dremel tool to sand along the edge of your cut to create a smooth, beveled finish. Put the cut tiles in place and you’re done.
- Can wood deck tiles be installed in bathroom? (28/05/2023 19:00:03)
- Deck Tiles Production Process (04/06/2022 13:21:38)
- Ideas To Decorate Your Balcony (03/06/2022 13:07:03)
- Advantages of outdoor deck tiles (02/06/2022 09:46:27)
- Our Wood Deck Tiles Is Coming To Germany (01/06/2022 15:19:55)
- How we control product quality? (01/06/2022 15:11:49)
- Viet Wood FSC Certification (26/05/2022 12:28:02)
- Installation tips of wood deck tiles (03/08/2018 16:27:11)
- On what surfaces can you install wood deck tiles? (03/08/2018 14:11:44)
- New trend flooring with wood deck tiles (30/07/2018 11:44:14)
- Hot trend hardwood flooring with Acacia wood deck tiles in summer (20/07/2018 16:42:21)
- Wood deck tiles - Good change - New idea (18/07/2018 12:11:53)
- New trend - Wood deck tiles (17/07/2018 16:59:12)
- WHY YOU CHOOSE CHARCOAL? (14/07/2018 10:44:20)
- Why finger joint board uses? (13/07/2018 16:17:19)
- Wood Deck Tiles for relatively easy to install and friendly user (12/07/2018 17:03:22)
- Adjustable Charcoal From Sawdust from Vietnam 2018 (11/07/2018 15:24:19)
- What is Rubberwood? (10/07/2018 17:12:30)
- The best charcoal for grill (09/07/2018 11:04:10)
- A part in the production process of Finger Joint Board (07/07/2018 09:39:06)
- A part in the production process of Finger Joint Board (Part 2) (07/07/2018 09:32:42)
- 300 x 300 x 19 mm Acacia Wood Deck Tiles (06/07/2018 16:18:05)
- Eucalyptus Core Veneer (06/07/2018 10:42:20)
- Standards customized of Finger Joint Board to come Korea (05/07/2018 16:49:21)
- Standards customized of Finger Joint Board to come Korea (05/07/2018 16:49:10)
- Wood deck tiles - The newest trend of exterior setting in summer (05/07/2018 14:17:38)
- Sawdust Charcoal - the best choice for BBQ (05/07/2018 13:57:58)
